
FluentCommunity brings member discussions and courses into WordPress. It is worth considering if you want a community on your own website and are comfortable managing its hosting, updates and member access. This review covers where it fits, the trade-offs to check, and a practical setup example for a writing workshop.
The setup screenshots come from our earlier walkthrough. We have checked the instructions against the current official documentation; screens and available features can vary with your version and license.
- What FluentCommunity does
- Features and licensing
- Trade-offs and alternatives
- Installation and setup
- Checks before inviting members
What is FluentCommunity?
FluentCommunity is a community plugin from WPManageNinja, the team behind FluentCRM and Fluent Forms. It organizes conversations into Spaces and combines member profiles, discussions and learning features in a dedicated portal on your WordPress site.
A good use case is a course community: lessons give members a structured path, while discussion Spaces give them somewhere to ask questions and share work. A product support community or private client group can use the same structure without needing a course.
Features and licensing: what to check
Start with the member experience you need, then confirm which features are included in your chosen version. The free plugin and Pro add-on have different scopes.
- Spaces and discussions: organize topics, publish posts and let members comment and react. Member profiles and directories help people find each other.
- Courses: current documentation lists course creation as a Pro feature. Confirm that its lesson, enrollment and assessment options match your teaching requirements.
- Private messages: one-to-one messaging requires Pro and must be enabled by an administrator.
- Engagement and media: polls, notifications, leaderboards, badges and file tools have different configuration and licensing requirements. Enable what your community will actually use.
Check the official free-versus-Pro feature information before purchasing. Include the license, hosting, email delivery and any payment or storage integrations in your budget; a plugin license is only part of the running cost.
Where FluentCommunity makes sense
Our recommendation is to shortlist it when your project already runs on WordPress and you want discussions and course content under the same administration. Start with a small pilot community so you can evaluate the actual member journey before moving an established audience.
Its FluentCRM integration can connect actions such as joining a Space or enrolling in a course with email automations. That is useful if you already use FluentCRM for email marketing; configure the triggers and contact handling for your own workflow.
Trade-offs to check before choosing it
- Performance needs a real test. Plugin ZIP size does not establish page speed. Test signed-in feeds, course pages and media uploads with realistic content and activity. Hosting capacity, integrations and simultaneous users all affect the result.
- The portal has its own interface. FluentCommunity documents theme compatibility options, including support for Blocksy. Check navigation, mobile layouts and the transition between your main website and portal rather than assuming every theme design choice will carry over.
- Learning requirements can go beyond a community course. Write down the assessments, reporting, certification and enrollment rules you need, then verify each in a trial before replacing an existing LMS.
- You still operate the community. Assign responsibility for moderation, member support, backups, updates, email delivery and access changes. The software does not remove that work.
If you are considering a move from BuddyBoss, compare your actual workflows on a staging site. Check member access, existing content, integrations and the migration path before committing. If you prefer a hosted community platform, compare the reduced site-management work with its recurring cost, customization options and export process. There is no single best choice for every community.
Installation and setup
The example below uses a writing workshop. The aim is to give enrolled students a place to read lessons and discuss their work, while keeping unpublished writing away from visitors. Start on a staging site or take a backup before changing an existing membership site.
1. Install the core plugin and any required add-on
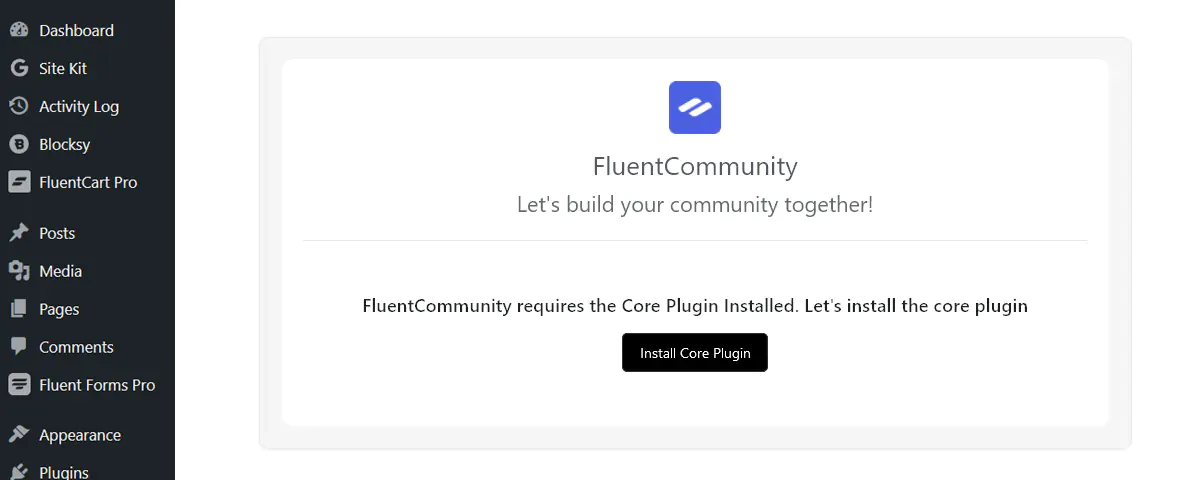
In WordPress, open Plugins → Add New, search for FluentCommunity, install it and activate it. For Pro, upload the ZIP from your account and activate the add-on alongside the core plugin. Follow the official installation instructions and activate your license as applicable.
2. Name the community and choose its portal address
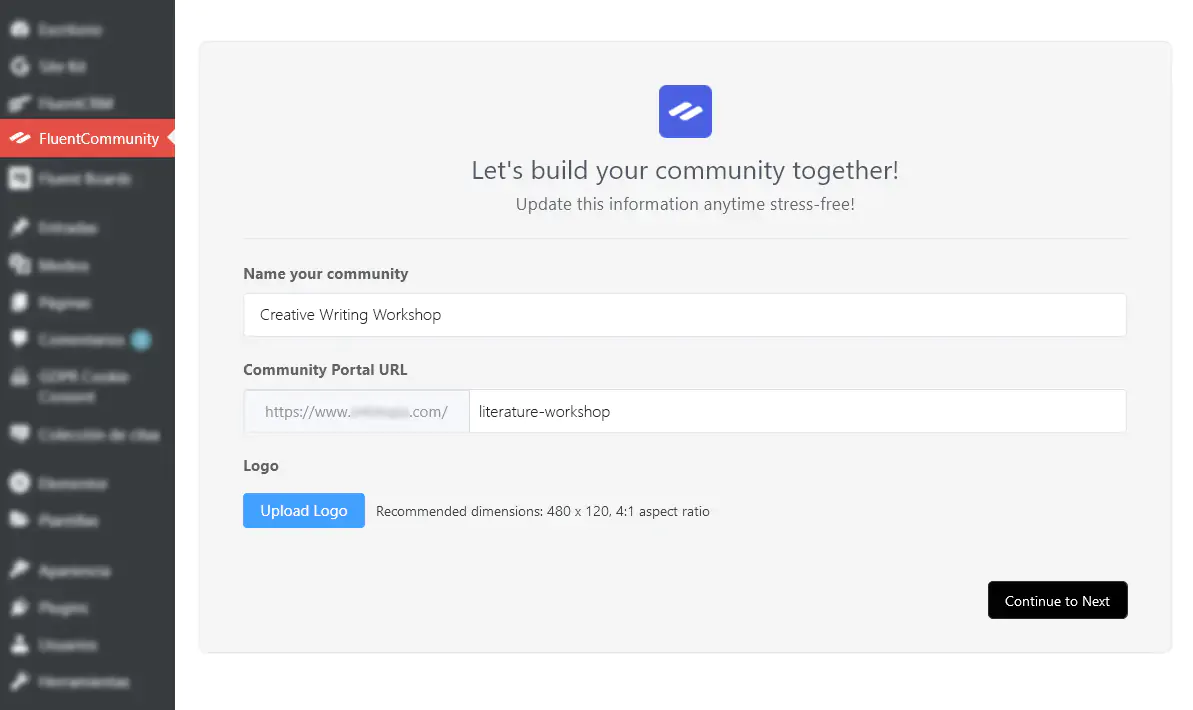
Use a name members will recognize and choose a clear portal path, such as /community/. Check that the path is not already used by another page. Add the community logo and continue through the setup wizard.
3. Choose a starting template
The setup wizard offers four starting points. Choose one based on the community’s main purpose; the template does not replace checking feature availability and permissions.
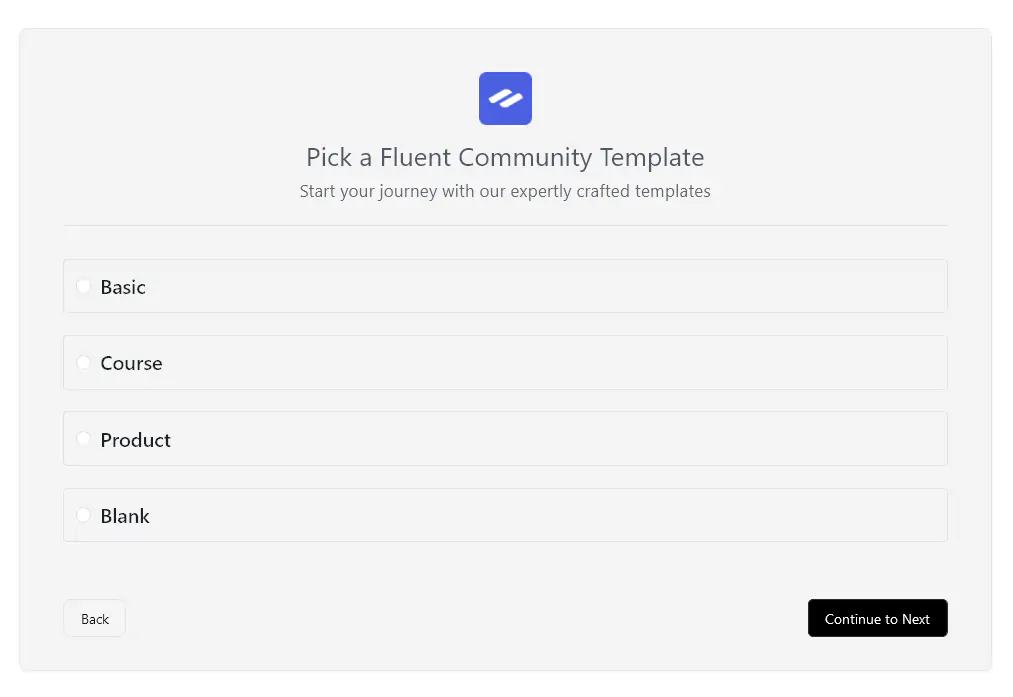
Basic: a starting point for a discussion-led community. Choose it when conversations are the main activity.
Course: a starting point for students and learning content. Confirm that your license covers the course features you need.
Product: a starting point for product feedback, support and user discussions.
Blank: start without a predefined structure and build only the Spaces and navigation your members need.
4. Shape the writing workshop
For this example, choose Course. Plan a small initial structure: a welcome area, a lesson sequence and a workshop discussion Space. Publish clear guidance explaining where students should introduce themselves, submit questions and share writing.

5. Set portal access, Space privacy and email delivery
Choose the portal audience during onboarding. For a private workshop, start with logged-in access and then configure the individual Spaces and course enrollment. Portal access alone is not a complete permissions plan.
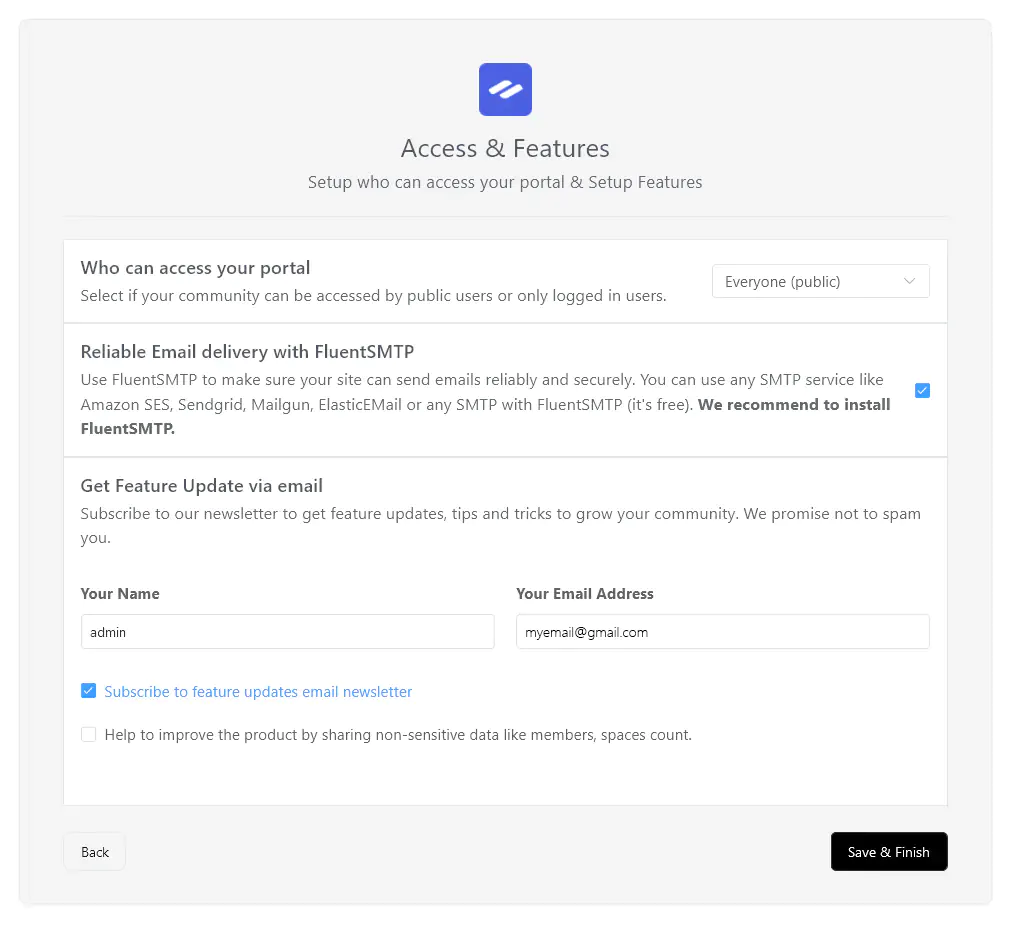
Under each Space’s settings, check its privacy level: public content is visible to visitors; a private Space can show basic information while restricting posts to approved members; a secret Space hides the Space from non-members. Choose deliberately for student work.
Configure the sender details and an email delivery service, such as FluentSMTP with a suitable provider. Test a notification and password reset with an account you control before inviting students. Enabling an email plugin alone does not verify delivery.
6. Review settings and assign responsibilities
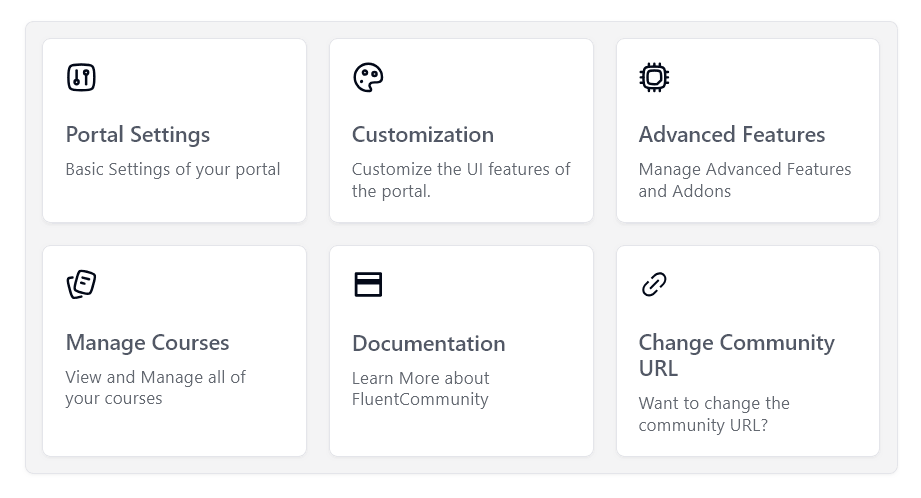
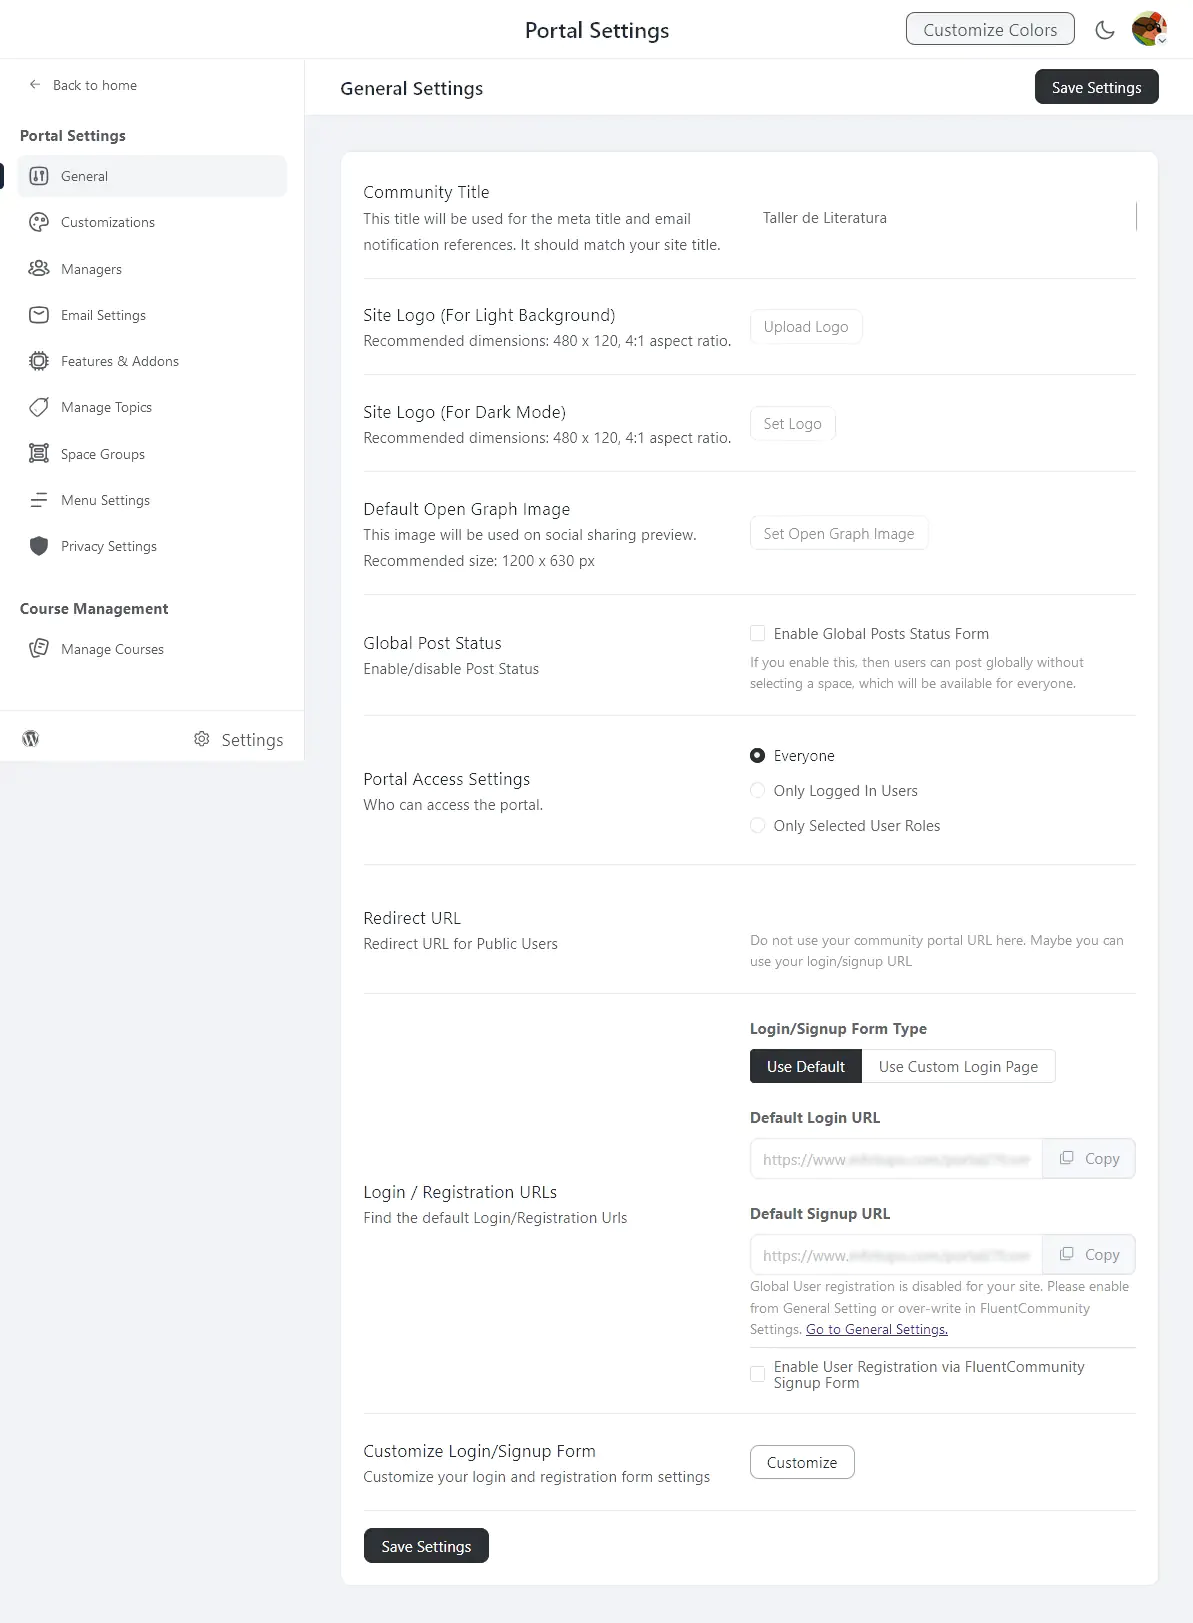
Open the portal dashboard and review appearance, course management and settings. Decide who will administer the community and who will moderate each discussion Space.
- General and appearance: confirm the name, logo, colors and login experience.
- Members and managers: give each person only the access needed for their role.
- Features and add-ons: enable the tools you intend to use and check their requirements.
- Topics, Space Groups and menus: organize the portal so a new member can find the right place to start.
- Privacy and courses: review directory visibility, profile visibility, enrollment and access to lesson content.
Checks before inviting members
Use the following as an acceptance checklist for your own installation. It describes what to verify; it is not a claim that a new live community has been tested for this article.
- Visitor: confirm that private workshop posts and restricted lessons cannot be opened while signed out.
- Registered non-member: confirm that creating an account does not grant access to the workshop automatically unless that is intended.
- Enrolled student: open the welcome content and a lesson, post in the correct Space and check the notification received.
- Moderator: check the intended moderation tasks without granting unnecessary site administration access.
- Mobile member: check sign-in, navigation, lesson reading and posting on a phone.
- Operations: confirm backups, restore arrangements, update ownership and the process for removing a member’s access.
Our verdict
FluentCommunity is a sensible option to evaluate for a WordPress community built around discussions, students or customers. Its appeal is bringing these activities into one site, especially when you already use the Fluent ecosystem. Choose it after checking the features, permissions and running costs your project needs—not on an untested promise of faster performance.
Need help maintaining the WordPress site behind your community?
Explore our WordPress maintenance service for ongoing site care, or tell us about your community so we can agree on the help you need.